 The Cyano Codex
Cyanotype with photographs: from your photo to blue paper
- Reviewed
- Reading time
- 15 min
- Sources
- 22
As an Amazon Associate I earn from qualifying purchases. How we are funded

In short
- Cyanotype is printed by contact: the negative has to be the same size as the final print.
- The digital negative is probably the most common route: the photo is inverted, flipped and printed on transparency film.
- A phone photo works, as long as it has enough resolution for the size of the print.
- Every combination of paper, chemistry, printer and light needs its own curve, made from a step wedge.
- For his Simple Cyanotype, Mike Ware accepts negatives with a density range of up to about 2.7–2.8.
- This site’s Digital Negative Maker inverts, flips and adjusts the curve in your browser.
On this page (11 sections)
- Can you make a cyanotype from photographs?
- Why do you need a negative the same size?
- From file to negative: invert, flip and adjust
- Can you make a cyanotype from a phone photo?
- Cyanotype as a photographic process
- Types of negative for cyanotype
- What density does the negative need?
- The curve and the step wedge: calibrating your combination
- Printing the negative: transparency film and printer
- Exposing the negative
- Negatives, safely
Can you make a cyanotype from photographs?#
Yes. To make a cyanotype from a photograph you need a negative the same size as the final print, placed in direct contact with the coated paper, under glass1. Probably the most common route is the digital negative: the photo is processed on the computer and printed on transparency film1.
Cyanotype has been a photographic process from the start, even though it’s best known for plant silhouettes. If you’re interested in the technique in general, start with what is cyanotype. This page is about cyanotype with photos: where the image comes from, how it becomes a negative, and what that negative needs to give a print with the full range of blues.
Learn more: what materials a cyanotype takes, with the transparency film and the contact frame this route calls for.
The process has five stages: choosing the image, preparing the negative, printing it, contact exposing it and washing the print. The first three are screen-and-printer work; the last two happen in the studio, as with any cyanotype.
Learn more: how to make a negative for cyanotype, step by step.
Why do you need a negative the same size?#
You need a negative the same size because cyanotype has low light sensitivity and, in practice, can’t be enlarged like a darkroom photo: it’s exposed for several minutes, by contact, with the negative pressed against the paper1. Whatever size the negative is, the print will be.
Mike Ware explains it this way: through a camera, only between a hundredth and a thousandth of the light reaches the sensitive surface4. That’s why photograms, which are also contact prints, are much easier than camera photos.
A film negative works, but it gives a print the same size as itself. To enlarge it, the usual route is to scan it and make a digital negative at the final size from it1. When you scan a negative, the image is already inverted: you don’t need to invert it again, and this site’s Digital Negative Maker lets you turn that step off.
Learn more: glass for cyanotype, with how to set up the contact.
From file to negative: invert, flip and adjust#
A digital negative is a scanned or digital image, processed in editing software and printed on transparency film1. For it to work, the image is inverted, from positive to negative, and flipped as a mirror image, so the printed side goes against the paper and the print doesn’t come out reversed5.
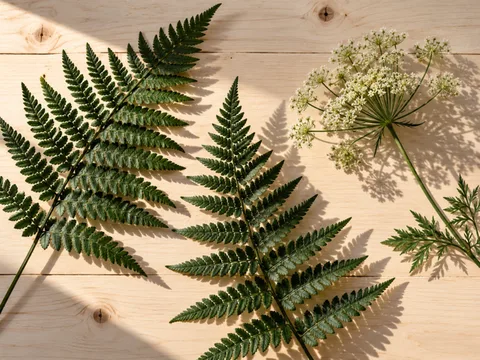
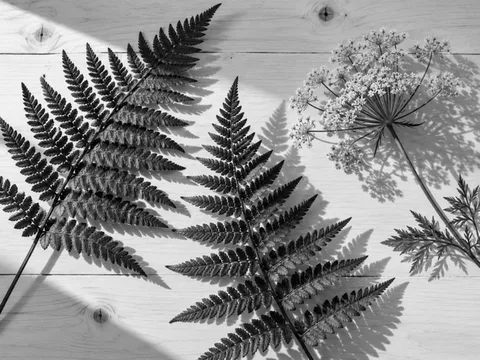
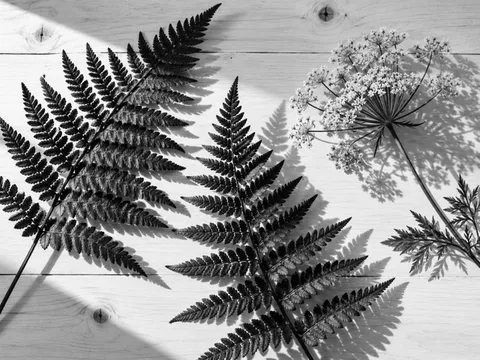
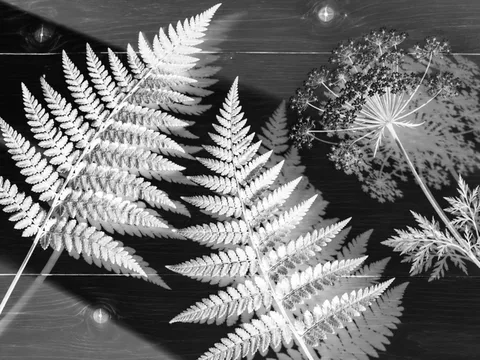
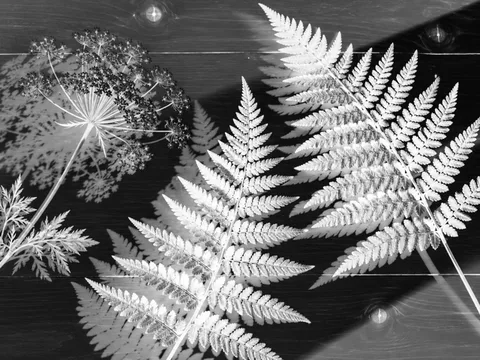
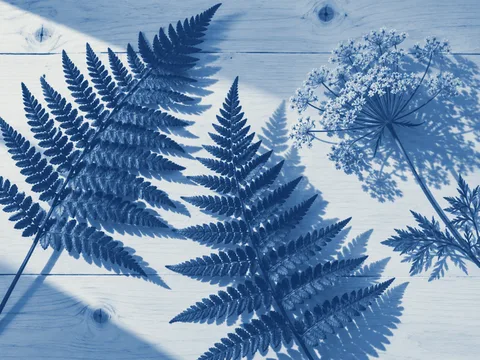
Each stage has its reason:
- Black and white. For its chemistry, Jacquard specifies a black-and-white photo, inverted and printed on transparency film with an inkjet printer6. The photo’s colors don’t carry over to the print, which is blue.
- Curve. Photographic processes don’t respond linearly, so the negative needs a correction curve to spread the tones properly between the paper white and the deepest blue7.
- Inversion. What’s light in the photo becomes dark in the negative, so that it’s light again in the print5.
- Mirror. The image is flipped horizontally: that way the ink touches the coated side and the left side stays on the left5.
- Printing. The negative is printed on transparency film, at the exact size of the print.
All of this can be done in any editing software, or in the browser, with nothing to install. This site’s Digital Negative Maker inverts, flips, applies the curve and outputs the sheet at actual size on A4 or Letter, and your photo never leaves your device.
Learn more: prepare your negative with the Digital Negative Maker, free and in your browser.
Can you make a cyanotype from a phone photo?#
Yes. A phone photo is a digital image like any other, and digital negatives start from scanned or born-digital images1. What you need to watch is resolution: the photo has to have enough pixels to print at the size of the print without the pixels showing.
For a cyanotype from a phone photo, the workflow is the same as with a camera: move the photo to the computer or open it in the browser, turn it into a negative and print it. The Digital Negative Maker warns you if the image has too little resolution for the chosen size, and suggests a smaller print or a larger file.
There are two things to watch that have nothing to do with pixels. First, save the photo without filters if you have the choice: you’ll make the tonal adjustments later, with the curve and while watching the preview. Second, export it in a common image format that the Digital Negative Maker can open.
Which photos work best in cyanotype#
In cyanotype, photos that read through their shapes and light work best, not through their color. The print comes out in a single color: what receives light turns Prussian blue and what’s covered stays white8. An image that relied on a red against a green in color can turn flat in blue.
Before preparing the negative, convert the photo to black and white and look at it that way. If it still reads, if it has a pale sky, a silhouette, a texture of water or stone, it will work. Backlit silhouettes, trees, architecture, plants and misty landscapes usually read well in blue.
The photo can also be the start of a series. The artist Elke Reinhuber photographed clusters of surveillance cameras in the Singapore subway, which look like flowers, and turned them into cyanotypes with digital negatives and “botanical” captions, as a tribute to Anna Atkins’s plates9. You can do the same in any city: choose an object that repeats, photograph it the same way every time and make a series from it.
There are even academic tools that simulate the blue result on screen and optimize the negative before printing10. Their authors, from the University of Tsukuba, presented one in 2023 that adjusts tone for several alternative processes, cyanotype among them11. The Digital Negative Maker’s blue preview follows the same idea, without promising the accuracy of a calibration.
Cyanotype as a photographic process#
Cyanotype has been used with photographic negatives almost from the beginning. In the late 19th century it became a cheap way to make proofs from collodion negatives, gelatin dry plates and roll film, and for postcards it was applied to heavier card stock12. It was the quick way to see what was on a negative.
That use explains part of its reputation as a humble technique, a proof before the real print. In contemporary work it has crossed to the other side: among the Spanish artists working with cyanotype, Gil-Segovia includes Elena Zabalza Blanco, who in 2018 published the photobook Reserva, in an edition of 28 copies, each with an original cyanotype1. In that use, the cyanotype is the final work, not a proof.
With a digital negative, any file can become a cyanotype. Unlike darkroom photography, you can watch the image form during exposure; it appears in blue during the wash and finishes darkening as it dries.
Types of negative for cyanotype#
In cyanotype there are four ways to get an image onto the paper: the printed digital negative, the film negative, the hand-made negative and the photogram, which uses no negative. All are contact exposed, and the print comes out the same size as whatever rests on the paper1.
| Type | What it is | What it’s for | Source |
|---|---|---|---|
| Digital negative | A digital image, inverted, flipped and printed on transparency film | Phone, camera or scanned photos, at any size | 1 |
| Film negative | The original negative from a camera | Prints the same size as the film; to enlarge, scan it | 1 |
| Hand-made negative | An opaque drawing on a transparent or translucent support | Illustration, lettering, plans, mixing with plants | 13,14 |
| Photogram (no negative) | Objects placed directly on the paper | Plants, lace, feathers, glass objects | 15 |
The hand-made negative has a long history: in blueprinting, drawings were made deliberately on translucent tracing paper or tracing cloth so they could be copied in cyanotype13. And in recent workshops with artists, negatives were drawn with a permanent black marker on transparent paper, even tracing printed images14.
Learn more: cyanotype photograms and hand-drawn negatives.
What density does the negative need?#
A negative’s density measures how much light it blocks: it’s the logarithm of the ratio between the light that arrives and the light that passes through16. Each increase of 0.30 lets through roughly half the light, one stop16. The density range is the difference between the lightest and darkest areas of the negative.
That range has to match what the chemistry can reproduce. For his Simple Cyanotype, Ware accepts long-range negatives, up to about 2.7, “to produce a full tonal range”17. His figures change from one formula to another:
| What you’ll hear | What the sources say | Source |
|---|---|---|
| A fixed density range for any cyanotype | It depends on the formula: for New Cyanotype, Ware calls for at least 1.8, from the density of the film itself, about 0.2, up to a maximum of 2 or more | 18 |
| A single figure for Simple Cyanotype | Ware’s own manual gives “up to about 2.7” on one page and “1.8 to a maximum of 2.8” in the summary | 17 |
| The figure usually given for the classic formula | According to Ware, the traditional formula only reproduces negatives well with a range of 1 to 1.2, roughly half that of New Cyanotype; it’s the author’s approximate figure | 19 |
Ware adds that his Simple Cyanotype can be adjusted to exposure scales between 2.7 and 1.4 by changing the sensitizer formula17. In other words, the chemistry can also be adapted to the negative, not just the negative to the chemistry.
For the classic formula, Ware’s figure is a guide, but it doesn’t replace measurement. The negative’s curve comes from a step wedge exposed with your paper and your light, and that measurement already includes what your combination can reproduce7.
Learn more: step wedge for cyanotype, to measure your range.
The curve and the step wedge: calibrating your combination#
The correction curve is the adjustment that distributes the negative’s grays so the print has the full range of blues. It’s calculated from a step wedge, a printed strip of grays from light to dark, which is printed, exposed and measured for each combination of process, paper and printer7. Every combination has its own.
The negative’s response depends on more than the printer. The lamp’s spectrum, the type of transparency film, and the color and composition of the inks all play a part: by varying the ink color and its ultraviolet absorption, you can control the density and gradation of the print20.
With the inkjet printers Reeder and Anderson tested, yellow is the strongest ultraviolet absorber after photo black, and photo black absorbs less than matte black5. These data come from their workflow with Epson inks: they may not hold for other brands. What does hold for everyone is the principle: what blocks ultraviolet isn’t always what looks blackest.
Any tool’s starting curve is only a guide. Moseley insists that full calibration routines are needed if you want to control gradation, especially in the highlights and shadows20.
Learn more: the digital negative curve, why and how to adjust it.
Printing the negative: transparency film and printer#
The negative is printed on transparency film, the clear plastic sheet that in many countries is called acetate, with whatever printer you have. Transparency films are sold for a specific type of printer, inkjet or laser, and one type doesn’t work in the other. Print at 100%, without the fit-to-page option, so the negative is the same size as the print.
Photocopies on acetate are the simplest option, but not the finest: Gil-Segovia notes that in 1995 Zelich advised against them for quality negatives, although printers and scanners have improved a lot since then1. Laser printers are also used in artwork: Reinhuber laser-printed the negatives for her series on transparent film9.
The guide to transparency film for cyanotype explains what to check for each type: the printer, the size, the printing side the manufacturer specifies and the number of sheets. We don’t say which absorbs more ink or gives more density: we haven’t found reliable sources that compare them.
Exposing the negative#
The negative is exposed like any cyanotype, but with more care over contact: the printed side against the coated side of the paper, under glass and with even pressure5. If an area doesn’t touch, it comes out blurry; in blueprinting, a soft backing was already used to prevent this13.
A test strip with a piece of the same negative gives you the time. With photo negatives, the strip should include highlights and shadows, because those are the areas that decide whether the time is right. The full method is in cyanotype exposure time, and setting up the glass and backing, on the contact page.
Negatives, safely#
Preparing and printing a negative carries none of cyanotype’s own risks: those come with the chemistry and the light. When exposing in the sun, the WHO recommends protection from UV index 3 with shade, clothing, sunglasses and sunscreen21; with a lamp, don’t look at it and wear safety glasses that block UV22. The rest is in how to protect your eyes from the UV lamp.
In this chapter
- How to make a negative for cyanotypeHow to make a negative for cyanotype: convert the photo to black and white, adjust the curve, invert, flip and print on inkjet or laser film.
- The digital negative curve in cyanotype: why and how to adjust itWhy a digital negative for cyanotype needs a correction curve, what changes it and how to derive it from a step wedge with your paper and your light.
- Step wedge in cyanotype: calibrating exposure and the negativeWhat a step wedge is, how to print or get one, how to expose and read it, and how to use the reading to set the time and the negative’s curve.
- Photograms: cyanotype with objects, no negativeWhat a photogram is, why objects come out white on blue, which objects work, how to arrange them and how long to expose them, with examples from artists.
- Hand-drawn negatives for cyanotype: acetate and tracing paperHow to draw a negative for cyanotype on acetate or tracing paper: which marker to use, how to combine it with plants and thread, and how to expose it.
Frequently asked questions
Can I make a cyanotype from an old paper photo?
Yes. Scan it or photograph it straight on, in even light, and treat it like any digital image: black and white, curve, inversion, mirroring and printing on transparency film the size of the print. It’s the digital negative method, which starts from scanned or born-digital images. The original isn’t touched: the blue print comes from its negative.
Can you use a film negative to make a cyanotype?
Yes, by contact, but the print comes out the same size as the negative, so a 35 mm negative gives a tiny cyanotype. To enlarge it, scan the negative and make a digital negative at the final size from it. Note: since the scan is already a negative, you don’t need to invert it again.
Why does my cyanotype from a photo come out reversed?
Because the negative wasn’t mirrored or was placed wrong side down. A digital negative is inverted and also flipped horizontally, so the printed side can go against the paper without the image coming out reversed. If you print without mirroring, place the printed side facing up, although contact will be slightly worse.
Can you make a cyanotype with an enlarger?
In practice, no. Cyanotype has low light sensitivity and is exposed for several minutes in sun or under an ultraviolet lamp, so it’s worked by contact, with a negative the size of the final print. To enlarge an image, you enlarge the file and print the negative at the size you want.
What size should the photo be for a cyanotype?
The negative has to be the same size as the print, and the photo needs enough resolution to print at that size without visible pixels. The Digital Negative Maker warns you if the image falls short for the chosen size, on an A4 or Letter sheet. If it falls short, choose a smaller print or a larger file.
Your next step
Make your first negative for cyanotype
How to make a negative for cyanotype: convert the photo to black and white, adjust the curve, invert, flip and print on inkjet or laser film.
Go to the next step: Make your first negative for cyanotype
Sources
- Gil-Segovia, J. A. (2022). La cianotipia como recurso en el arte contemporáneo: una luz azul que no se apaga. Arte, Individuo y Sociedad, 34(1), 167-186. https://doi.org/10.5209/aris.73063 Cited on: p. 169. 1234567891011
- Herschel, J. F. W. (1840). On the chemical action of the rays of the solar spectrum on preparations of silver and other substances, both metallic and non-metallic, and on some photographic processes. Philosophical Transactions of the Royal Society of London, 130. Transcription of JSTOR 108209: https://jimclifford.ca/philosophical-transactions-ocr-1665-1869/articles/jstor-108209/
- Herschel, J. F. W. (1842). On the action of the rays of the solar spectrum on vegetable colours, and on some new photographic processes. Philosophical Transactions of the Royal Society of London, 132, 181-214. https://doi.org/10.1098/rstl.1842.0013
- Ware, M. (2014). Cyanomicon: History, science and art of cyanotype: Photographic printing in Prussian blue (revised and expanded ed.). https://www.mikeware.co.uk/mikeware/downloads.html Cited on: p. 33.
- Reeder, R. and Anderson, C. Z. (2013). How to make digital negatives [Excerpt]. In C. Z. Anderson, Gum printing and other amazing contact printing processes. Reproduced at Freestyle Photographic Supplies. https://www.freestylephoto.com/alternative-process/making-digital-negatives 12345
- Jacquard Products. (n.d.). Cyanotype sensitizer set [Product page]. https://www.jacquardproducts.com/cyanotype-set Accessed October 16, 2026.
- Reeder, R. and Anderson, C. Z. (2020). Digital negatives with QuadToneRIP: Demystifying QTR for photographers and printmakers. Routledge. https://doi.org/10.4324/9781003017806 123
- Redden, H. and Crawford, A. (2025). Anna Atkins and the making of macroalgae cyanotypes and their role in science education. Applied Phycology, 6(1), 1-8. https://doi.org/10.1080/26388081.2024.2435049
- Reinhuber, E. E. (2022). National flowers in blue: Reinvigorating analog imaging techniques in the era of big data and pixel perfection. In Proceedings of EVA London 2022 (pp. 46-50). BCS Learning & Development. https://doi.org/10.14236/ewic/EVA2022.10 12
- Ozawa, C., Yamamoto, K., Izumi, K. and Ochiai, Y. (2022). Computational alternative photographic process toward sustainable printing. In SIGGRAPH Asia 2022 Technical Communications (article 19, 4 pp.). ACM. https://digitalnature.slis.tsukuba.ac.jp/2022/11/computational-alternative-photographic-process-toward-sustainable-printing/
- Ozawa, C., Yamamoto, K., Izumi, K. and Ochiai, Y. (2023). Give life back to alternative process: Exploring handmade photographic printing experiments towards digital nature ecosystem. In ACM SIGGRAPH 2023 Labs (pp. 1-2). ACM. https://doi.org/10.1145/3588029.3599735
- Stulik, D. C. and Kaplan, A. (2013). Cyanotype. In The atlas of analytical signatures of photographic processes. Getty Conservation Institute. https://www.getty.edu/conservation/publications_resources/pdf_publications/pdf/atlas_cyanotype.pdf
- Price, L. O. (1995). The history and identification of photo-reproductive processes used for architectural drawings prior to 1930. Topics in Photographic Preservation, 6, 41-49. https://resources.culturalheritage.org/pmgtopics/1995-volume-six/06_03_Price.html 123
- Mendez, A. and Lopez-Leon, R. (2023). Creativity and cyanotype: Exploring camera-less photography as an alternative for art education. Arts & Communication, 1(2), Article 1453. https://doi.org/10.36922/ac.1453 12
- J. Paul Getty Museum. (n.d.). Photogram. In Glossary of photographic terms. https://www.getty.edu/art/collections/glossary/g341.html Accessed October 16, 2026.
- International Union of Pure and Applied Chemistry. (2025). Absorbance, A; Decadic absorbance. In Compendium of chemical terminology (5th ed., online version 5.0.0). https://goldbook.iupac.org/terms/view/A00028 Accessed October 16, 2026. 12
- Ware, M. (2022). Alternative photographic processes: Simple Cyanotype [PDF instructions]. https://mikeware.co.uk/downloads/SimpleCy22.pdf Accessed October 16, 2026. Cited on: p. 10, pp. 10 and 12, p. 2. 123
- Ware, M. (n.d.). The New Cyanotype process. Mike Ware: Alternative photography. https://www.mikeware.co.uk/mikeware/New_Cyanotype_Process.html Accessed October 16, 2026.
- Ware, M. (n.d.). The traditional cyanotype process. Mike Ware: Alternative photography. https://mikeware.co.uk/mikeware/Traditional_Cyanotype.html Accessed October 16, 2026.
- Moseley, P. (2013, August 28–September 1). Manipulation of inkjet negative/positive transparencies to manage the image reflectance density, tonal gradation and contrast of photogravure, platinum, carbon transfer and other photographic contact printing processes [Conference presentation]. Impact 8 International Printmaking Conference. https://uwe-repository.worktribe.com/output/929438 12
- World Health Organization. (2022, June 21). Ultraviolet radiation [Fact sheet]. https://who.int/news-room/fact-sheets/detail/ultraviolet-radiation Accessed October 16, 2026.
- Bullard. (n.d.). Z87.1 marking [Product information]. https://apac.bullard.com/products/eye-protection/z87-1-marking/ Accessed October 24, 2026.
Reviewed on October 16, 2026. If you spot an error or a missing source, write to us and we’ll look into it.
How to cite this page
The Cyano Codex. (2026, October 16). Cyanotype with photographs: from your photo to blue paper. https://cyanocodex.com/en/negatives/