 The Cyano Codex
How to make a negative for cyanotype
As an Amazon Associate I earn from qualifying purchases. How we fund the site

- Time
- One session at the screen and printer, plus the test strip
- Level
- Intermediate
- Materials
- 9
- Steps
- 7
In short
- The negative is the same size as the print: cyanotype is exposed by contact and isn’t enlarged.
- Jacquard calls for a black-and-white photo, inverted and printed on transparency film with an inkjet printer.
- The image is inverted and mirrored so the printed side can face the paper without the print coming out reversed.
- Every combination of paper, printer and light needs its own curve; the first one comes from a step wedge.
- Transparency film depends on the printer type: inkjet film doesn’t work in a laser printer, or vice versa.
- Print at 100%, with “fit to page” off, and check the negative against the light before exposing.
Safety: Turn the lamp on only once the print is in place, don’t look at it, and wear UV-blocking safety glasses. More on safety
Safety: Keep leftover solution and the first wash bath in a closed, labeled container for your local hazardous waste collection point; later rinses can go down the drain with plenty of water. More on safety
Materials list
Check off what you already have on the table. The “Amazon” links are affiliate links.
Your check marks are saved only in this browser. No account needed.
On this page (5 sections)
How do you make a cyanotype negative?#
A cyanotype negative is a digital or scanned photo, processed in an editing program and printed on transparency film1. It’s converted to black and white, adjusted with a curve2, inverted and flipped to a mirror image3. It’s the same size as the print, because cyanotype is exposed by contact and isn’t enlarged1.
It’s the centerpiece of cyanotype from photographs, and you can make one with any photo editor that can invert, flip and apply curves. You can also do it without installing anything: this site’s Digital Negative Maker carries out the same steps in your browser. The steps below apply to both routes.
Step 1: Choose the photo and its final size
Decide on the print size first, because the negative will be exactly that size. Cyanotype is exposed with the negative in direct contact with the paper, and the print comes out the same size as the negative1. Crop the photo to those proportions and check that it has enough resolution to print at that size without visible pixels.
If you’re starting from a paper photo, scan it or photograph it straight on, in even light. If you’re starting from a scanned film negative, keep in mind that it’s already a negative: you won’t need to invert it later1.
How to tell it’s going well: the image is the size of the print and doesn’t pixelate when you view it at that size on screen.
Step 2: Convert it to black and white
Convert the photo to grayscale. For its chemistry, Jacquard calls for a black-and-white photo, inverted and printed on transparency film with an inkjet printer4. The photo’s colors don’t carry over to the print, which comes out in a single color: Prussian blue.
Look at the grayscale photo before going on. If the shapes still read, it will work; if everything depends on a color that’s no longer there, find another image or boost the contrast.
How to tell it’s going well: in grayscale, the image has light highlights, dark shadows and something in between.
Step 3: Adjust the tones with the curve
Apply a correction curve, the adjustment that redistributes the grays so the print has the full range of blues. It’s needed because photographic processes don’t respond linearly: without correction, the tones aren’t evenly spread between the white of the paper and the darkest blue2.
The first time, you won’t have a curve of your own. Start with no correction or a gentle adjustment, make the test print and, when you can, measure your combination with a step wedge for cyanotype, which is where the right curve comes from2. The digital negative curve has its own page, with the reasoning behind it.
How to tell it’s going well: in the adjusted image, the highlights haven’t blown out to white and the shadows haven’t blocked up to black.
Step 4: Invert the photo for cyanotype
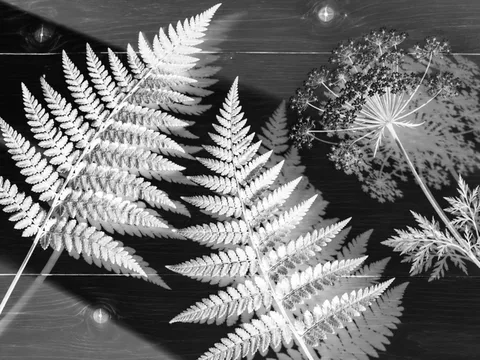
Invert the image to turn it from positive to negative: what is light in the photo becomes dark in the negative, holds back the light and comes out light again in the print3. In almost every program it’s a one-click command, with a name like “Invert” or “Negative.”
Diagram 1From photo to inverted, mirrored negative. The five steps that turn a photo into a cyanotype negative, and why the print doesn’t come out reversed. If you started from a scanned film negative, skip this step: the image was already inverted, and inverting it again would give a positive, which in cyanotype prints with the tones reversed.
How to tell it’s going well: the sky, which was light, is now dark, and the shadows in the photo look almost transparent.
Step 5: Flip it to a mirror image
Flip the image horizontally, as in a mirror. That way you can place the printed side of the transparency against the coated side of the paper and the print comes out with left on the left3. If you don’t flip it, either the ink faces up or the image comes out reversed.
Putting the ink against the paper is also how the negative touches the sheet without the thickness of the film in between. Anything that doesn’t make good contact with the paper comes out blurry, which is why contact matters so much in cyanotype5.
How to tell it’s going well: if the photo had a sign in it, it now reads backward on screen.
Step 6: Print it on transparency film
Print on transparency film made for your type of printer, at 100% and without the fit-to-page option, so the negative is the same size as the print. Use the side the film’s manufacturer specifies, which is the one coated to take the ink, and let it dry before you touch it.
Not all inks block ultraviolet equally. In the inkjet printers Reeder and Anderson tested, yellow is the strongest ultraviolet absorber after photo black, and adding yellow makes the negative denser to ultraviolet and higher in contrast3. It’s an advanced adjustment, measured with Epson inks: to start with, black is enough.
How to tell it’s going well: the ink is dry, it doesn’t smear when you brush it with the edge of a sheet of paper, and the negative is the same size as the print.
Common mistake: printing with “fit to page.” The printer changes the size and the negative no longer matches the marks on the print.
Step 7: Check the negative and run a test
Look at the negative against the light. A good one shows the whole scale: nearly clear areas, which will give the deepest blue, midtone grays, and very dark areas, which will give the whites. If everything looks mid-gray, the print will come out flat; go back to the curve before you use up paper.
For the test, cut a piece of the negative that has both highlights and shadows and expose it on a strip of the same paper, printed side against the sheet and under glass. Expose in sections, doubling the time from one to the next: the right time may fall between two6. The simplest way to get good contact is a flat surface with a heavy sheet of glass on top5.
Wash the strip, let it dry and compare it with the negative. If the shadows come out well and the highlights stay white, you have your time and your negative; if not, adjust the curve or the time and repeat.
How to tell it’s going well: the dry strip has clean whites, deep blues and grays in between.
Safety: Turn the lamp on only once the print is in place, don’t look at it, and wear UV-blocking safety glasses. More on safety
Safety: Keep leftover solution and the first wash bath in a closed, labeled container for your local hazardous waste collection point; later rinses can go down the drain with plenty of water. More on safety
How do you make a negative without Photoshop?#
You can make a negative without Photoshop in any photo editor, free or paid, that has three commands: invert, flip horizontal and curves3,2. You can also do it without installing anything: make your negative with the Digital Negative Maker, which carries out all three steps in the browser and outputs the sheet at actual size.
The Digital Negative Maker is designed for this technique. It inverts the photo by default, unless you tell it it’s already a negative; it applies the mirror flip so the printed side goes against the paper; it lets you adjust the curve by zones or from an exposed step wedge; and it lays out the sheet on A4 or Letter, with crop marks and a 21-step wedge alongside if you want one. Your photo never leaves your device.
What no tool can do is get the curve right without measuring. The starting curve is only a guide: every paper, every printer and every light source responds differently, and fine calibration comes from your own step wedge7.
If you have a laser printer#
If you have a laser printer, you need laser transparency film, which withstands the heat of printing; inkjet film doesn’t work in it. The steps are the same: black and white, curve, inversion, mirror flip and printing at 100%. Laser printing is also used in artwork: Elke Reinhuber laser-printed the negatives for her series National Flowers on transparent film8.
We don’t know how toner blocks ultraviolet compared with ink: we haven’t found reliable sources that compare them. That’s why a curve that works for you on an inkjet printer won’t work on a laser printer, and vice versa. Each printer gets its own step wedge and its own test strip.
Photocopies on acetate work on the same principle, but with less control over tone. Gil-Segovia notes that Zelich, in 1995, advised against them for quality negatives, although printers and scanners have improved a great deal since then1.
Going further with digital negatives#
Digital negatives have a technical literature of their own, almost all of it in English. In 2020 Ron Reeder and Christina Z. Anderson published a book devoted to digital negatives with QuadToneRIP, a printing program for negatives, with a chapter on cyanotype2. For cyanotype in general, Anderson published a 320-page monograph with Focal Press in 20199.
That second book includes chapters on toning, troubleshooting, and finishing, framing and storage, according to the publisher’s table of contents9. If you want to go beyond photographs, hand-drawn negatives are another option, made with marker or ink on acetate or tracing paper. It isn’t a new idea: in blueprinting, drawings were deliberately made on translucent tracing paper or tracing cloth so they could be copied as cyanotypes10.
If something goes wrong#
A negative’s flaws show up in the first print:
- The print comes out flat, all midtone blues. The negative lacks range or curve: check the adjustment and measure your combination with a step wedge.
- The print comes out reversed. The mirror flip is missing, or the transparency was placed ink side up.
- The tones come out reversed. It was inverted twice, almost always because it started from an already scanned negative.
- The print comes out blurry. The ink wasn’t touching the paper or there wasn’t enough pressure: the printed side goes against the sheet, under a heavy sheet of glass5.
- The negative doesn’t match the print. It was printed with “fit to page”: print it again at 100%.
If the problem is in the blue of the print and not in the negative, the Troubleshooter will lead you to the cause. Exposing with a negative calls for the same care as any other exposure, in the sun or under a lamp; the rules for light and chemistry are in cyanotype safety.
Frequently asked questions
Can you print a cyanotype negative on regular paper?
The usual choice is transparency film. Translucent tracing paper has also been used: for decades, plans were drawn on it so they could be copied as cyanotypes. Opaque paper won’t work, because it blocks the light that has to reach the coated sheet. If you want to try a translucent paper, run a long test strip with it first.
Can I have the negative printed at a print shop?
Yes, as long as they print on transparency film, at actual size and with the image already inverted and flipped. Bring the file ready to go and ask them not to fit it to the page. Photocopies on acetate have been advised against for quality negatives, although the machines have improved; judge the result with a test strip.
Should you print the negative in color or in black and white?
To start with, in black and white, which is what Jacquard calls for with its chemistry. Color negatives are an advanced technique: some inks, such as yellow in certain inkjet printers, block a lot of ultraviolet and let you adjust density and contrast. They require calibrating each ink, so they’re not the place to start.
Why won’t the ink dry on the transparency?
Almost always because it was printed on the wrong side or on film made for a different type of printer. Inkjet film has one side coated to take the ink, and it’s the one the manufacturer specifies; laser film doesn’t work in an inkjet printer. Let the negative dry before placing it on the paper.
Your next step

Sources
- Gil-Segovia, J. A. (2022). La cianotipia como recurso en el arte contemporáneo: una luz azul que no se apaga. Arte, Individuo y Sociedad, 34(1), 167-186. https://doi.org/10.5209/aris.73063 Cited on p. 169. 12345
- Reeder, R. and Anderson, C. Z. (2020). Digital negatives with QuadToneRIP: Demystifying QTR for photographers and printmakers. Routledge. https://doi.org/10.4324/9781003017806 12345
- Reeder, R. and Anderson, C. Z. (2013). How to make digital negatives [Excerpt]. In C. Z. Anderson, Gum printing and other amazing contact printing processes. Reproduced at Freestyle Photographic Supplies. https://www.freestylephoto.com/alternative-process/making-digital-negatives 12345
- Jacquard Products. (n.d.). Cyanotype sensitizer set [Product page]. https://www.jacquardproducts.com/cyanotype-set Accessed October 16, 2026.
- Jacquard Products. (2021). Cyanotype detailed instructions [Manufacturer instructions, version 08.17.21]. https://cdn.shopify.com/s/files/1/0053/5540/5423/files/Cyanotype_Instructions.pdf Accessed October 16, 2026. 123
- Ilford Photo. (2017, March 30). Making a black & white print: Exposure testing. https://www.ilfordphoto.com/exposure-testing/ Accessed October 16, 2026.
- Moseley, P. (2013, August 28–September 1). Manipulation of inkjet negative/positive transparencies to manage the image reflectance density, tonal gradation and contrast of photogravure, platinum, carbon transfer and other photographic contact printing processes [Conference paper]. Impact 8 International Printmaking Conference. https://uwe-repository.worktribe.com/output/929438
- Reinhuber, E. E. (2022). National flowers in blue: Reinvigorating analog imaging techniques in the era of big data and pixel perfection. In Proceedings of EVA London 2022 (pp. 46-50). BCS Learning & Development. https://doi.org/10.14236/ewic/EVA2022.10
- Anderson, C. Z. (2019). Cyanotype: The blueprint in contemporary practice. Routledge. https://www.routledge.com/products/9781138338845 12
- Price, L. O. (1995). The history and identification of photo-reproductive processes used for architectural drawings prior to 1930. Topics in Photographic Preservation, 6, 41-49. https://resources.culturalheritage.org/pmgtopics/1995-volume-six/06_03_Price.html
Reviewed on October 16, 2026. If you spot an error or a missing source, write to us and we’ll look into it.