 The Cyano Codex
What you need to make cyanotypes
- Reviewed
- Reading time
- 15 min
- Sources
- 24

In short
- The chemistry is two salts: green ferric ammonium citrate and potassium ferricyanide, not ferrocyanide.
- With pre-coated paper you only need to add sun and water: the chemistry is already on the sheet.
- Paper: watercolor paper with no alkaline buffer, since alkalinity breaks down Prussian blue.
- You don’t need a darkroom: dim light from an incandescent bulb is enough, with no fluorescent lights or sun.
- Light: the sun or a 365 nm lamp, which at equal energy performs better than a 395 nm one.
- Glasses and nitrile gloves from the moment you open the bottle until the first wash.
On this page (13 sections)
- What do you need to make cyanotypes?
- Three ways to start: no chemistry, with a kit or from scratch
- The complete materials list
- The chemistry: two iron salts
- The support: paper or fabric
- To spread the solution: foam brush, paintbrush or rod
- A dim corner for coating and drying
- Contact: glass, negative or objects
- Light: the sun or a UV lamp
- Development: water, trays and a place to dry
- Protection: glasses and gloves
- After the print: framing and storage
- What you already have at home, and what shouldn’t leave the kitchen
What do you need to make cyanotypes?#
To make cyanotypes you need seven things: the chemistry, a support that can take water, something to spread the solution, a glass to press the negative or plants against the paper, ultraviolet light, water for washing, and glasses and gloves. The chemistry is two iron salts that form Prussian blue in light1.
You don’t have to buy everything: trays, clothespins, masking tape or a clock are usually already at home, and for exposure the sun is enough. What is worth buying carefully is the chemistry, the paper or fabric, and the protection, because that’s where the mistakes that ruin a print happen. Each material has its own buying guide, linked in its section.
How much you need depends on how you start. With pre-coated paper, the chemistry is already on the sheet; with a chemistry kit, it comes pre-weighed; with loose reagents, you prepare it yourself. This table sums up what you need in each case.
| Stage | With pre-coated paper | With a chemistry kit | With loose reagents |
|---|---|---|---|
| Chemistry | Already on the sheet | Two bottles with pre-weighed reagents | Green ferric ammonium citrate and potassium ferricyanide, a scale and bottles |
| Support | Included | Watercolor paper or natural-fiber fabric | Watercolor paper or natural-fiber fabric |
| Apply | Not needed | Foam brush, paintbrush or rod | Foam brush, paintbrush or rod |
| Contact | Plastic sheet or glass | Glass and board, or a frame | Glass and board, or a frame |
| Light | Sun or 365 nm lamp | Sun or 365 nm lamp | Sun or 365 nm lamp |
| Development | Tray and water | Tray, water and a bottle for the first bath | Tray, water and a bottle for the first bath |
| Protection | Clean hands or gloves | Glasses and gloves | Glasses and gloves |
Learn more: cyanotype kits, with the five types and what each one includes.
Three ways to start: no chemistry, with a kit or from scratch#
You can start cyanotype in three ways, depending on how much you want to prepare: with pre-coated paper, which already has the chemistry; with a powdered chemistry kit, which only needs water added; or with loose reagents, which you weigh out following a formula. All three give the same cyanotype; what changes is the prep work and the freedom to choose the support.
No chemistry: pre-coated paper#
It’s the shortest route: you place the object on the sheet, expose it to the sun and rinse it in water. Pre-coated cyanotype paper is still sold for teaching and as an educational toy2. Don’t be misled by the name: it isn’t darkroom photographic paper, which is gelatin silver and needs chemical development and a darkroom3.
It’s also the way to make cyanotypes with kids, because nobody touches the reagents: in the Science in School classroom activity, young students use paper that’s already dry4. The formats are in sun print paper for cyanotype, and kits meant as gifts for a child in cyanotype kits for kids.
With a chemistry kit#
A powdered chemistry set comes with both reagents already weighed: you add water to each bottle and, once they dissolve, mix them in equal parts. You choose the paper or fabric. Jacquard estimates its set makes about 65 prints of 20.3 × 25.4 cm on paper or about 50 on fabric5. A complete kit adds paper and a frame with glass in the same box.
From scratch: loose reagents#
With loose reagents you prepare the solution yourself. Mike Ware’s traditional formula uses 25 g of green ferric ammonium citrate and 10 g of potassium ferricyanide, each dissolved in distilled water to make 100 ml, mixed in equal parts6. You need a precision scale and bottles to store each solution separately.
Learn more: how to make a cyanotype, with the complete process and a simple first session.
The complete materials list#
Twenty-five things, in six stages. Not all of it has to be bought: the sun, the water, the trays and the masking tape you already have. With ready-made paper you skip the first stage entirely, because the chemistry comes in the sheet.
-
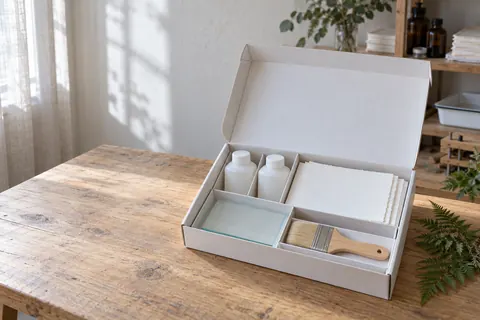
Stage 1
The chemistry
Green ferric ammonium citrate (25 g), potassium ferricyanide (10 g) and distilled water (200 ml), plus a 0.1 g scale, a 100 ml graduated cylinder and two amber bottles. Or a kit that comes with them already weighed out. Or neither, if you use ready-made paper.
-

Stage 2
The support
Cotton watercolor paper with no alkaline buffer: 160 gsm up to A4, and 240 gsm or more at A3. On cloth, natural fiber, prewashed and without softener.
-
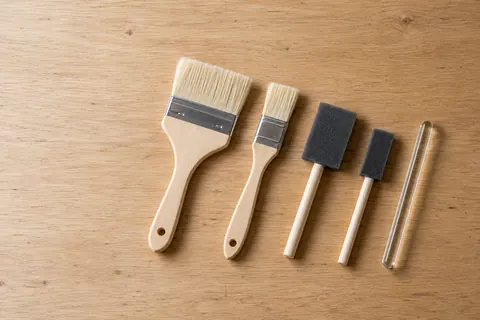
Stage 3
Coating and contact
A foam brush or a wide brush with no metal ferrule, and a contact printing frame or a board with ordinary glass and clips. If you print negatives, transparency film for your printer; if you work with plants, a press.
-
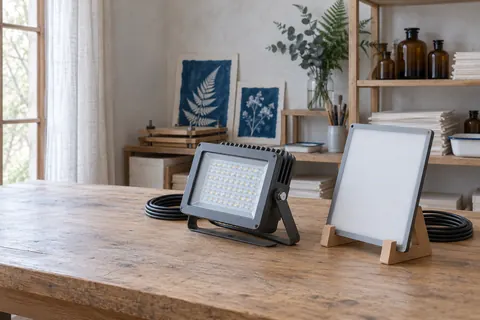
Stage 4
The light
Midday sun, which costs nothing, or a 365 nm UVA lamp, which at equal energy does more than a 395 nm one. With a lamp, goggles with a UV-blocking lens, ideally with a U number.
-
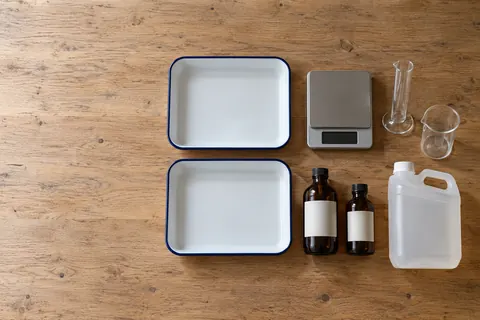
Stage 5
Washing and drying
Two or three trays larger than the print, cold tap water that is neither hard nor alkaline, a labeled bottle to collect the first bath, and clips with a rack in the shade.
-
Stage 6
Protection
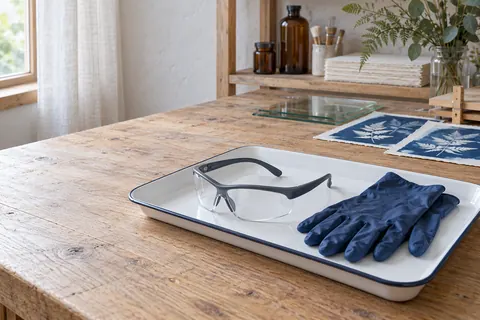
Nitrile gloves and safety goggles, worn from the moment you open the bottle until the first wash. The first bath does not go down the drain: closed bottle, and off to a hazardous waste point.
If you would rather take it on paper to the workshop or the shop, it is in the printable materials list.
The chemistry: two iron salts#
Cyanotype chemistry is two iron salts: ferric ammonium citrate and potassium ferricyanide. Light reduces the iron in the citrate, and that iron reacts with the ferricyanide to form Prussian blue1. You can buy them loose or in a kit, and either way, what matters is that the label gives the right name.
The most common mistake is confusing ferricyanide with ferrocyanide. Classic cyanotype uses potassium ferricyanide, red prussiate of potash; potassium ferrocyanide, or yellow prussiate, is a different compound, which Herschel already described as much less sensitive to light6. For the citrate, ask for the green form: according to Ware, it’s preferable to the brown, which also works, but more slowly6.
How to recognize each reagent on the label, with its synonyms and CAS number, is explained in where to buy potassium ferricyanide and in ferric ammonium citrate. Both salts are stored away from acids: the ferricyanide safety data sheets warn that in contact with them it releases very toxic gases7.
For the water in the solutions, Ware uses distilled water6; in an educational setting, Redden and Crawford use tap water for mixing and rinsing8. If your water is very hard, distilled water removes any doubt.
Learn more: cyanotype formula, with the full preparation without a kit.
The support: paper or fabric#
The support for cyanotype is almost always watercolor paper or natural-fiber fabric. For paper, Mike Ware recommends using only papers without a calcium carbonate alkaline buffer9, because alkaline materials quickly break down Prussian blue2. For fabric, cotton, linen or silk work, and polyester generally doesn’t10.
Weight matters too: according to Ware, 160 g/m² paper is enough up to A4, and for A3 or larger it’s best to use 240 g/m² or more, so it doesn’t cockle when wet9. 300 g/m² watercolor papers more than meet that. Be careful with papers sold “for cyanotype”: many aren’t coated and need chemistry bought separately.
Fabric has its own guide, with pretreated fabric in sheets and how far a chemistry set goes on fabric: fabric for cyanotype. The technical criteria for paper, with the chemistry behind them, are in what paper to use for cyanotype.
Learn more: paper for cyanotype, with what to check on the spec sheet before you buy.
To spread the solution: foam brush, paintbrush or rod#
To spread the solution over the paper you can use a foam brush, a wide paintbrush or a glass rod, kept for the studio only. Consumption changes: Mike Ware estimates about 1.5 ml of solution for a 20.3 × 25.4 cm print with a glass rod9, and with a brush you can use up to twice that6. A brush leaves stroke marks at the edges.
If you’re going to use a tool with the chemistry, it should never go back to the kitchen or to other paints. With pre-coated paper you don’t need any.
Learn more: brush for cyanotype, with how to choose each tool and what isn’t known about ferrules.
A dim corner for coating and drying#
You don’t need a darkroom to coat and dry the paper: a corner with dim light is enough. Mike Ware prepares and applies the solution under dim tungsten bulb light, with no fluorescent lights or daylight9, and lets the coated paper dry in the dark at room temperature for an hour9.
A drawer, a cardboard box or a closet works for drying in the dark. What you shouldn’t do is leave coated paper in view of a sunny window or under fluorescent lights.
Learn more: a darkroom for cyanotype, with how to set up a dim-light corner.
Contact: glass, negative or objects#
Cyanotype is contact printed: the negative or object is placed directly on the paper, under glass, and the print comes out the same size11. For that you need ordinary glass and something to press it down, a contact printing frame or a board with clips, and whatever you’re going to print: a negative printed on transparency film, or flat objects.
The glass has to be ordinary glass, because it lets through UVA, which cyanotype responds to; laminated glass and glass with a solar control film block much more12,13. To get started, the Science and Media Museum suggests homemade setups with clips, acrylic, bubble wrap or melamine board14.
If you’re going to print photos, you need transparency film for cyanotype of the right type for your printer. If you’re going to print plants, they have to be flat and dry: Anna Atkins already warned that with thick specimens the impression came out imperfect15. That’s what a flower press for cyanotype is for, or some heavy books, as the Natural History Museum suggests16.
Learn more: contact printing frame for cyanotype, with what to check before you buy one and how to improvise one.
Light: the sun or a UV lamp#
Cyanotype is exposed with ultraviolet light, and the sun is enough to get started. If you want to expose without depending on the sky, a 365 nm UV lamp is the option backed by sources: at equal energy, it performs better than a 395–405 nm one, although the actual time also depends on its power and the distance17.
With sun or lamp, you don’t guess the time: you measure it with a test strip, exposing a strip in sections with times that double from one to the next18. A piece of opaque card and a clock are all you need to make one.
Learn more: UV lamp for cyanotype, with what to check on the spec sheet and which lamps to avoid.
Development: water, trays and a place to dry#
Cyanotype is developed with water alone: washing removes the unreacted salts, and that bath is the only fixing needed11. For washing you need one or two trays larger than the paper, kept for the studio only, water, and clothespins to hang the prints to dry in the shade.
Ware washes the print in running water until the yellow of the sensitizer has completely disappeared from the highlights, and estimates about 20 minutes6. He insists that the wash water should not be alkaline or hard, with calcium salts, because it degrades the image19.
Add a bottle or jug with a lid to the list. The practice this site recommends is to keep leftover solution and the first wash bath in a closed, labeled container for your local hazardous waste collection point, and to pour the following washes down the drain with plenty of water20. Before taking it in, ask your local hazardous waste collection point or city hall how they accept liquids.
Safety: Keep leftover solution and the first wash bath in a closed, labeled container for your local hazardous waste collection point; later rinses can go down the drain with plenty of water. More on safety
Learn more: developing cyanotype, with the baths, times and acid bath, and studio accessories for cyanotype, with what to look for in trays, scales and bottles.
Protection: glasses and gloves#
For classic cyanotype, simple gear is enough: glasses and nitrile gloves. For mixing and brushing on the solution, wear goggles marked D3, the ANSI Z87.1 mark for splashes and droplets21, and the Sigma-Aldrich safety data sheet calls for nitrile rubber gloves for ferricyanide20.
With a UV lamp you need safety glasses that block UV22, and in the sun, the same protection as for any time spent outdoors. With pre-coated paper, handling the dry paper is considered safe and needs no special precautions, other than washing your hands afterward4.
Classic cyanotype is a low-risk process, but not a zero-risk one: the reagents irritate the eyes, mustn’t be mixed with acids, and their leftovers harm aquatic life7. With glasses, gloves and a tidy studio, the risk is under control; every rule, with the reason behind it, is in cyanotype safety.
Safety: Wear safety glasses and nitrile gloves to mix and brush on the solution; if it splashes into your eyes, rinse with plenty of water for 15 minutes. More on safety
Learn more: safety glasses for cyanotype, with what to look for in the markings and on the glove spec sheet.
After the print: framing and storage#
A finished cyanotype is stored or framed with materials that have no alkaline buffer. The guidelines from the AIC photographic materials group state that materials with an alkaline buffer should not be used with cyanotypes23, and an “acid-free” label doesn’t guarantee that24. For framing you need a mat, photo corners and a frame with glass that doesn’t touch the work.
If you want to go beyond blue, toning and mixed media call for other materials, each with its own safety data sheet; you’ll find them on their pages, and the books that cover them in cyanotype books.
Learn more: framing supplies for cyanotypes, with what to ask for in each part and why we don’t link a specific mat, and sleeves and boxes for storing cyanotypes.
What you already have at home, and what shouldn’t leave the kitchen#
Much of what you need to make cyanotypes is already at home: clothespins, masking tape, scissors, a clock or timer, a sheet of black card, paper towels and a dim corner. What you shouldn’t do is use kitchen utensils: anything that comes into contact with the chemistry stays in the studio.
- From the studio, never to the kitchen: cups, spoons, trays and brushes that have touched the solution.
- From the kitchen, never to the studio: food or drink containers for storing the solutions.
- For the bottles: amber or opaque glass, tightly closed and labeled with the name of the reagent.
Safety: Work away from food and drink, with dedicated tools that never go back to the kitchen. More on safety
If you’re going to give the materials to someone else, the cyanotype gifts guide sorts the options by who’s receiving them. And if you’d rather have the list on paper, on the table, print it out.
Learn more: printable materials list, with every material by stage.
In this chapter
- The best cyanotype supplies for each useThe best cyanotype kit for what you want to do: starting from scratch, trying it without chemistry, fabric, kids, negatives, protection and books, with the reasoning behind each pick.
- Cyanotype kits: the five types and who each one is forPowdered chemistry, complete kit, pre-coated paper or fabric: what each type of cyanotype kit includes, how many sheets it makes and who each one is for.
- Cyanotype kits for kids: ready-made paper and an adult nearbyCyanotype kits for kids with pre-coated paper or fabric: what each one includes, what age its manufacturer states and what the adult has to supply.
- Sun print paper for cyanotype, ready to usePre-coated cyanotype sun print paper: it isn’t darkroom photographic paper. Which formats exist, what each one includes and how long it takes in the sun.
- Paper for cyanotype: which to buy to coat yourselfWhat paper to buy for cyanotype: cotton, weight and no alkaline buffer, why “acid-free” isn’t enough, how much paper a kit needs and how to read the spec sheet.
- Fabric for cyanotype: pretreated or to coat yourselfPretreated cyanotype fabric or chemistry rated for fabric: which fiber to ask for, how much fabric a set covers and why there’s no textile kit.
- Brush for cyanotype: what to spread the solution withWhat brush to use for cyanotype: foam brush, wide paintbrush or glass rod, how much solution each one uses according to Ware, and how to choose and care for it.
- Contact printing frame for cyanotype: what to check before you buyWhat to look for in a cyanotype contact printing frame: glass with no UV filter, a hinged back, even pressure and size, and when glass with clips is enough.
- Transparency film for cyanotype: inkjet or laserWhich transparency film to buy for printing cyanotype negatives: inkjet or laser, A4 or letter, printable side and why the ink matters too.
- Flower press for botanical cyanotype: what to look for when buyingWhat to look for in a flower press for botanical cyanotype: usable size, blotting paper, pressure system and boards, and when a few books and a weight will do.
- UV lamp for cyanotype: what to buy and what to avoidWhy 365 nm and not 395, why to check the voltage and plug, what area and power to check, which lamps to avoid and how to protect your eyes.
- Glasses and gloves for cyanotype: what protection to buyWhat glasses and gloves to buy for cyanotype: goggles for the solution, UV-blocking glasses for working with the lamp, and nitrile for your hands.
- Studio accessories for cyanotype: trays, scale and bottlesWhich studio accessories cyanotype calls for and what to look for when buying them: developing trays, a precision scale, a graduated cylinder, syringes and amber glass bottles.
- Framing supplies for cyanotypes: what to ask for and what to avoidWhat to buy to frame a cyanotype: a mat with no alkaline buffer, adhesive-free photo corners and UV-filtering glass. “Acid-free” isn’t enough.
- Sleeves and boxes for storing cyanotypes: what material to ask forWhich envelopes, sleeves and boxes to buy for storing cyanotypes: paper with no alkaline buffer, uncoated polyester and flat boxes. “Acid-free” isn’t enough.
- Published cyanotype books: which to read for your levelPublished cyanotype books: beginner projects, a technical manual, creative techniques and the work of Anna Atkins, with what each one offers.
- Cyanotype gifts for beginnersWhat cyanotype gift to give: a complete kit to get started, a children’s kit with supervision, a project book or Anna Atkins’s work, depending on who it’s for.
Frequently asked questions
How much does it cost to get started with cyanotype?
It depends on how you start: the shortest route is a pack of pre-coated paper, and the most complete, a kit with chemistry, paper and a frame. We don’t publish prices because they change; each buying guide gives the yield the manufacturer states, so you can work out the cost per sheet with the price you see at the time.
Can you make cyanotypes without a kit?
Yes. Just buy the two reagents loose, green ferric ammonium citrate and potassium ferricyanide, and prepare the solutions with distilled water: Mike Ware’s traditional formula calls for 25 g of citrate and 10 g of ferricyanide, each made up to 100 ml, mixed in equal parts. You’ll also need a precision scale and bottles to store them in.
Where do you buy cyanotype supplies?
The chemistry, paper and fabric are sold in art supply and photography stores, and online; on this site we link to Amazon.com. What matters is asking for the right names: potassium ferricyanide, not ferrocyanide, and green ferric ammonium citrate. The rest, such as trays, clips or tape, you probably already have at home.
Can you use tap water for cyanotype?
For preparing the solutions, Mike Ware uses distilled water; in an educational setting, Redden and Crawford use tap water for mixing and rinsing. For washing the print, what matters is that the water isn’t alkaline or hard, because that degrades the image. If your water is very hard, at least prepare the solutions with distilled water.
What supplies do I need to make cyanotypes with kids?
Pre-coated paper or fabric, a clear plastic sheet or a piece of glass handled by an adult, sun, a tray of water and gloves for rinsing. With pre-coated paper, kids don’t touch the reagents: they compose the image, watch the color change and rinse the print with an adult nearby.
Does any glass work for cyanotype?
No. Ask for ordinary glass: laminated glass and UV-filtering glass block exactly the light the print needs. Polycarbonate does not work well either, because it normally blocks radiation below about 370 nm. To start, a board, a sheet of glass slightly larger than the paper and a few clips are enough.
How long should a cyanotype be left in the sun?
There is no universal time, because what counts is the ultraviolet dose, that is, intensity multiplied by time. With a UV lamp and the classic formula, Mike Ware reckons about 20 to 30 minutes. The reliable way to find yours is a test strip with times that double from step to step: it gives you the time for your light and your paper in a single session. Under overcast sky ultraviolet still gets through, around a third of it according to the EPA.
How long does cyanotype chemistry keep once mixed?
Kept apart, the two solutions last months: Jacquard gives at least 6 months to 1 year. Mixed, they last far less: days according to Ware, and 2 to 4 hours according to Jacquard. That is why they are kept in separate amber bottles, closed, labeled and in the dark, and mixed just before coating. A mix that turns from yellow to dark blue has gone off.
Do you need a darkroom for cyanotype?
No. A dim corner with soft bulb light, no fluorescents and no direct sun, is enough to coat the paper and let it dry. Once coated and dry, the paper is kept in the dark until it is time to expose.
What do you do with leftover cyanotype chemistry?
Leftover solution and the first wash bath go into a closed, labeled bottle, and from there to a household hazardous waste point. Later washes can go down the drain with plenty of water. Ferricyanide is toxic to aquatic life, and the waste bottle is kept in the dark, because light can release free cyanide. Some municipal by-laws set limits for cyanides in the sewer.
Your next step
How to make your first cyanotype
How to make a cyanotype at home: the solution, the paper, exposure in sun or under a lamp, washing and drying, and a simple first session to get started.
Go to the next step: How to make your first cyanotype
Sources
- Sentoku, S., Kurashina, M. and Kida, K. (2025). Observation of blue particles formed by photosensitizing reaction on paper fibres of cyanotypes. Photochem, 5(3), Article 18. https://doi.org/10.3390/photochem5030018 12
- Stulik, D. C. and Kaplan, A. (2013). Cyanotype. In The atlas of analytical signatures of photographic processes. Getty Conservation Institute. https://www.getty.edu/conservation/publications_resources/pdf_publications/pdf/atlas_cyanotype.pdf 12
- Stulik, D. C. and Kaplan, A. (2013). Silver gelatin. In The atlas of analytical signatures of photographic processes. Getty Conservation Institute. https://getty.edu/conservation/publications_resources/pdf_publications/pdf/atlas_silver_gelatin.pdf
- Egan, P. (2025, June 10). Adventures in cyanoprinting: Where art and chemistry meet. Science in School, 73. https://scienceinschool.org/article/2025/cyanoprinting-where-art-and-chemistry-meet/ 12
- Jacquard Products. (n.d.). Cyanotype sensitizer set [Product page]. https://www.jacquardproducts.com/cyanotype-set Accessed October 16, 2026.
- Ware, M. (n.d.). The traditional cyanotype process. Mike Ware: Alternative photography. https://mikeware.co.uk/mikeware/Traditional_Cyanotype.html Accessed October 16, 2026. 123456
- Honeywell Specialty Chemicals Seelze GmbH. (2025). Safety data sheet: Potassium hexacyanoferrate(III) (version 2.4, ref. 31253). https://pdf.dutscher.com/doc/31253-1KG-HON/31253-1KG-HON_FDSen.pdf. Accessed October 16, 2026. 12
- Redden, H. and Crawford, A. (2025). Anna Atkins and the making of macroalgae cyanotypes and their role in science education. Applied Phycology, 6(1), 1-8. https://doi.org/10.1080/26388081.2024.2435049
- Ware, M. (2009). New Cyanotype: Siderotype workshop notes. https://www.mikeware.co.uk/downloads/CyanoWork.pdf Accessed October 17, 2026. 12345
- Jacquard Products. (2019). Cyanotype FAQs [Manufacturer’s document, version 02.08.19]. https://cdn.shopify.com/s/files/1/2714/2506/files/Cyanotype-FAQs.pdf Accessed October 17, 2026.
- Image Permanence Institute. (n.d.). Cyanotype. Graphics Atlas. Rochester Institute of Technology. https://new.graphicsatlas.org/cyanotype Accessed October 17, 2026. 12
- Tuchinda, C., Srivannaboon, S. and Lim, H. W. (2006). Photoprotection by window glass, automobile glass, and sunglasses. Journal of the American Academy of Dermatology, 54(5), 845-854. https://doi.org/10.1016/j.jaad.2005.11.1082
- Almutawa, F., Vandal, R., Wang, S. Q. and Lim, H. W. (2013). Current status of photoprotection by window glass, automobile glass, window films, and sunglasses. Photodermatology, Photoimmunology & Photomedicine, 29(2), 65-72. https://doi.org/10.1111/phpp.12022
- National Science and Media Museum. (2011, February 18). Introduction to the cyanotype process. National Science and Media Museum Blog. https://blog.scienceandmediamuseum.org.uk/introduction-cyanotype-process/ Accessed October 17, 2026.
- Franchi, S. (2024). Crafting and collecting cyanotypes: Anna Atkins's Photographs of British Algae: Cyanotype Impressions. Literature Compass, 21(1-3), Article e12708. https://doi.org/10.1111/lic3.12708
- Hendry, L. (n.d.). How to press flowers. Natural History Museum. https://www.nhm.ac.uk/discover/how-to-press-flowers.html Accessed October 16, 2026.
- Turner, J., Parisi, A. V., Downs, N. and Lynch, M. (2014). From ultraviolet to Prussian blue: A spectral response for the cyanotype process and a safe educational activity to explain UV exposure for all ages. Photochemical & Photobiological Sciences, 13(12), 1753-1764. https://doi.org/10.1039/c4pp00166d
- Ilford Photo. (2017, March 30). Making a black & white print: Exposure testing. https://www.ilfordphoto.com/exposure-testing/ Accessed October 16, 2026.
- Ware, M. (2022). Alternative photographic processes: Simple Cyanotype [PDF instructions]. https://mikeware.co.uk/downloads/SimpleCy22.pdf Accessed October 16, 2026.
- Sigma-Aldrich. (2026). Ficha de datos de seguridad: Hexacianoferrato(III) de potasio (version 11.0, ref. 244023). https://www.sigmaaldrich.com/ES/es/sds/sigald/244023. Accessed October 16, 2026. 12
- American National Standards Institute. (n.d.). ANSI/ISEA Z87.1-2020: Current standard for safety glasses [Blog article]. https://blog.ansi.org/ansi-isea-z87-1-2020-safety-glasses-eye-protection/ Accessed October 24, 2026.
- Bullard. (n.d.). Z87.1 marking [Product information]. https://apac.bullard.com/products/eye-protection/z87-1-marking/ Accessed October 24, 2026.
- American Institute for Conservation, Photographic Materials Group. (2004). Exhibition guidelines for photographic materials: Section 1.5.4 Matting, backboards, and support materials (S. Watkins, comp.). Photographic Materials Conservation Catalog. https://aic.wikiworks.com/wiki/PMG_Section_1.5.4_Matting,_Backboards,_and_Support_Materials Accessed October 16, 2026.
- Northeast Document Conservation Center. (2018). Storage enclosures for photographic materials (Preservation Leaflet 5.6). https://www.nedcc.org/free-resources/preservation-leaflets/5.-photographs/5.6-storage-enclosures-for-photographic-materials Accessed October 17, 2026.
Reviewed on October 16, 2026. If you spot an error or a missing source, write to us and we’ll look into it.
How to cite this page
The Cyano Codex. (2026, October 16). What you need to make cyanotypes. https://cyanocodex.com/en/supplies/