 The Cyano Codex
Digital Negative Maker for cyanotype
As an Amazon Associate I earn from qualifying purchases. How we fund the site

Make your negative
We don’t upload your photo: everything happens in your browser. When you close the page, it’s gone.
Your browser can’t run this tool. Try a recent version of Chrome, Edge, Firefox or Safari.
Preview of your print
Choose a photo
Drag it here or choose it from your device: JPG, PNG or WebP.
- Upload your photo
- Choose size, border and tone
- Download the full-size PDF
- Free
- No sign-up
- Your photo is never uploaded to a server
Approximate simulation: the actual blue depends on the paper, the chemistry and the exposure.
With the preview focused, move the crop with the arrow keys (hold Shift to go faster) and zoom in or out with + and −.
Recommended: the sheet prints at its exact size. Print at 100% or “Actual size,” never with “Fit to page.”
With a PNG, many programs resize the image when printing: if you want the exact size, use the PDF.
In short
- The negative is printed at the size of the print, because cyanotype is exposed by contact.
- Inverting and mirroring put the printed side against the paper and the print the right way around.
- No single curve works for everything: the right one comes from a step wedge printed, exposed and read with your own combination of materials.
- The photo is processed on your device; only the settings are remembered, never the image.
- Print at 100%, without “Fit to page,” and check that the printed ruler measures 50 mm.
On this page (8 sections)
What does the Digital Negative Maker do?#
The Digital Negative Maker turns a photo into the negative a cyanotype needs. It converts it to grayscale, inverts the tones, mirrors it and places it full size on an A4 or Letter sheet. You download a PDF, print it on transparency film and expose it in contact with the coated paper.
A digital negative is a digital or scanned image, processed on a computer and printed on transparency film; today it is probably the most common way to make negatives for cyanotype1. This is one of the site’s free cyanotype tools. If you’d rather understand the process before using it, start with cyanotypes from photographs or with how to make a cyanotype negative by hand, in any photo editor.
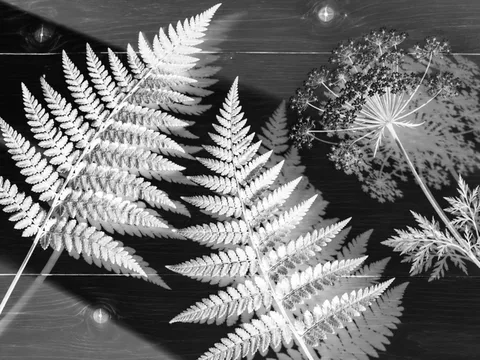
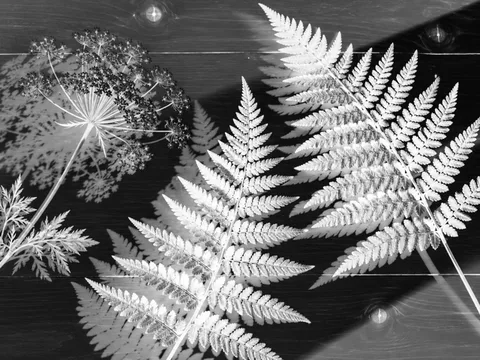
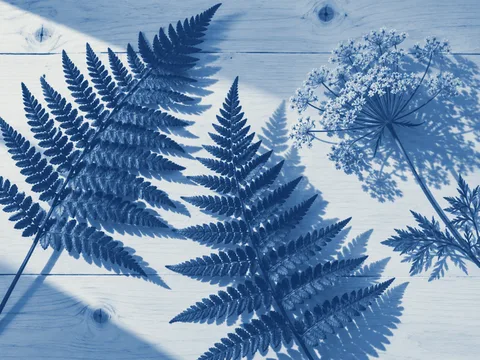
How to use it, in four steps#
- Choose the photo. Click “Choose photo” or drop it onto the work area. JPG, PNG and WebP work, and in Safari HEIC does too. If you just want to see how it works, use the sample photo.
- Choose the sheet and the print size. The sheet is the transparency you’re going to print on: A4, Letter or another size. The print size is the size of the paper or fabric you’re going to expose, and the negative has to be the same size as the final print, because it sits in direct contact with it1.
- Adjust the tone, if needed. The first time, leave it with no curve. Once you’ve exposed a step wedge, enter its two readings under “Fine-tune with a step wedge” and save the result as “My curve.”
- Check and download. Leave “Invert the tones” and “Print mirrored” turned on, add the step wedge and the reference ruler if they fit, and click “Download the full-size PDF.”
You can jump from one step to another whenever you like. The shortest route is to choose the photo, choose the sheet and download.
What does it do to your image?#
The Digital Negative Maker does five things to your image: it converts it to grayscale, adjusts it with a curve if you choose one, inverts the tones, mirrors it and scales it to full size. None of these is a calibration. It’s a starting point that you fine-tune with an exposed test.
- Grayscale. Cyanotype has only one color, so the photo is converted to grayscale to show you which tones the print can have.
- Inversion. In the print, whatever receives ultraviolet light turns blue and whatever stays covered stays white2. That’s why the negative carries ink where the photo is light and lets light through where the photo is dark.
- Mirroring. The image is flipped so that the inked side goes against the coated side and the print doesn’t come out reversed3.
- Curve. Photographic processes don’t respond to light in a linear way. To distribute the tones properly, the negative needs a correction curve made from a step wedge printed, exposed and read for each combination of process, paper and printer4,5.
- Size. The PDF comes out at the exact size of the sheet, with the print placed in millimeters, crop marks and, if there’s room, a 50 mm reference ruler.
Why does every printer produce a different negative?#
The same file produces different negatives on different printers, because each ink blocks ultraviolet light in its own way. How the negative responds depends on the lamp’s spectrum, the type of transparency film and the color and composition of the inks5. That’s why the curve is measured with your own materials.
In the inkjet printers Reeder and Anderson tested, photo black blocked less ultraviolet than matte black, and yellow was the strongest absorber after photo black3. That result applies to their equipment, not to every brand. The practical approach is to print the step wedge with the same printer, the same ink and the same transparency film as your negatives.
The formula matters too. According to Mike Ware, traditional cyanotype only reproduces negatives well if they have a density range of 1 to 1.2, that is, little difference between their clearest and darkest areas; his New Cyanotype accepts 1.8 to 2.46. Density measures how much light the negative blocks: each additional 0.30 lets through roughly half as much7. With the classic formula, a high-contrast photo can lose detail in the highlights or the shadows, and reading the step wedge tells you where.
What the tool stores, and what it doesn’t#
The Digital Negative Maker doesn’t store your photo anywhere. The image is read and processed inside the browser, including when you export, and the tool makes no network request with it. There are no accounts, no forms that send data and no server that receives the image. When you close the page, it’s gone.
What is remembered, only in that browser, are the settings: the sheet, units, margin, border, resolution, checkboxes and your curve. That way you don’t have to set them again on every visit. The “Forget my settings in this browser” button deletes them.
Before you print the negative#
The PDF comes out at actual size, but the print dialog can ruin that. Go through this list before you use up a sheet of transparency film:
- Scale at 100% or “Actual size.” Turn off “Fit to page.”
- Highest quality, or “Photo,” in the printer driver.
- Print on the side of the transparency that’s coated for your type of printer: the manufacturer states it on the package.
- Let the ink dry for as long as the manufacturer recommends before placing it on the paper.
- Measure the printed reference ruler: if it isn’t 50 mm, the printer has changed the size.
Inkjet and laser transparency films are not interchangeable. Transparency film for cyanotype negatives explains how to choose the right one for your printer.
Limitations worth knowing#
- One image per sheet. The Digital Negative Maker doesn’t lay out several prints or several photos on the same transparency.
- Calibration is manual. It’s done with the two readings from an exposed step wedge; the tool doesn’t read the step wedge from a photo.
- The blue preview is a simulation. It maps each gray to a tone between Prussian blue and paper white, and gives you a rough idea, but the actual blue depends on the paper, the chemistry and the exposure. There are academic precedents for tools that simulate the result and optimize the tones before printing8; ours is simpler.
- Formats. It doesn’t open TIFF, RAW, PSD or PDF files. Save the photo as a JPG or PNG first.
- Memory. Large sheets at 360 dpi can exceed the browser’s memory; if that happens, the tool will suggest exporting at 300 dpi.
- Film negatives. A scanned negative is already a negative: turn off inversion. This is how you enlarge a small negative, which by contact would only give a print of its own size1.
Downloads and tools that go with it#
To calibrate without the tool in front of you, download the printable step wedge; the step wedge page explains how to expose and read it, and the digital negative curve page explains how to carry that reading over to the negative. You can record each test in the Exposure Log, with the light, the time and the result.
Frequently asked questions
Is my photo uploaded to a server?
No. The photo is read and processed inside your browser, and the tool doesn’t send the image anywhere. The only things stored, and only in that browser, are the settings: the sheet, units, margin, resolution and your curve. When you close the page, the photo is gone; and “Forget my settings” deletes the rest as well.
Why does the negative come out reversed, as a mirror image?
Because the printed side of the transparency goes against the coated side of the paper. When you flip it over to place it that way, the image is reversed left to right; printing it mirrored makes up for that flip and the print comes out the right way around. If you’re going to place the ink side up, turn off mirroring.
Can I use it with a scanned film negative?
Yes, but turn off “Invert the tones”: a film negative is already a negative, and inverting it again would give you a positive. Scan it, set the size to that of the print you want and set mirroring according to how you’ll place the transparency. This is the way to enlarge a small negative.
Which curve should I choose the first time?
Start with no curve. Print the step wedge with your printer and your transparency film, expose it like a print and, once it’s dry, enter the last step with the deepest blue and the first one that comes out white into the Digital Negative Maker. With that, the negative will use the range of grays your combination can tell apart.
What size should I print the negative?
At the exact size of the print you want, because cyanotype is exposed by contact and isn’t enlarged. Choose the size of the paper or fabric in the Digital Negative Maker, print the PDF at 100% and measure the reference ruler: if it isn’t 50 mm, the print dialog has changed the scale.
Your next step

Sources
- Gil-Segovia, J. A. (2022). La cianotipia como recurso en el arte contemporáneo: una luz azul que no se apaga. Arte, Individuo y Sociedad, 34(1), 167-186. https://doi.org/10.5209/aris.73063 123
- Redden, H. and Crawford, A. (2025). Anna Atkins and the making of macroalgae cyanotypes and their role in science education. Applied Phycology, 6(1), 1-8. https://doi.org/10.1080/26388081.2024.2435049
- Reeder, R. and Anderson, C. Z. (2013). How to make digital negatives [Excerpt]. In C. Z. Anderson, Gum printing and other amazing contact printing processes. Reproduced on Freestyle Photographic Supplies. https://www.freestylephoto.com/alternative-process/making-digital-negatives 12
- Reeder, R. and Anderson, C. Z. (2020). Digital negatives with QuadToneRIP: Demystifying QTR for photographers and printmakers. Routledge. https://doi.org/10.4324/9781003017806
- Moseley, P. (2013, August 28–September 1). Manipulation of inkjet negative/positive transparencies to manage the image reflectance density, tonal gradation and contrast of photogravure, platinum, carbon transfer and other photographic contact printing processes [Conference presentation]. Impact 8 International Printmaking Conference. https://uwe-repository.worktribe.com/output/929438 12
- Ware, M. (n.d.). The traditional cyanotype process. Mike Ware: Alternative photography. https://mikeware.co.uk/mikeware/Traditional_Cyanotype.html Accessed October 16, 2026.
- International Union of Pure and Applied Chemistry. (2025). Absorbance, A; Decadic absorbance. In Compendium of chemical terminology (5th ed., online version 5.0.0). https://goldbook.iupac.org/terms/view/A00028 Accessed October 16, 2026.
- Ozawa, C., Yamamoto, K., Izumi, K. and Ochiai, Y. (2023). Give life back to alternative process: Exploring handmade photographic printing experiments towards digital nature ecosystem. In ACM SIGGRAPH 2023 Labs (pp. 1-2). ACM. https://doi.org/10.1145/3588029.3599735
Reviewed on October 16, 2026. If you spot an error or a missing source, write to us and we’ll look into it.